Friday, 30 October 2015

Dear Santa………. BoBunny DT

Hi there :)

Its funny how our tastes change, don't you think? When it came to Christmas I was always shades of red and gold.  My sister is always silver, white and glass.  Well her tree is anyway.  But the more years I scrapbook the more Im changing and Im not religiously sticking to my original colours for decorations - except the tree!  That stays the same colour scheme.  Of course if my husband allowed me to have another tree, well you never know what I'll come up with! lol ;)


So, Dear Santa? Its bright and actually quite funky and I found I liked it.  The wheels started spinning on what I could do with it, and then I remembered these boxes I had from last Christmas, and the idea came together.
Last year my sister organised a present from all my family for a series of date nights for Forbes and I and they were all printed out on paper, and popped in a small box. And then another one.  And another - there were 5 in total, all separately wrapped.  Her idea was that I would be able to use them later.  Did I mention she was sniggering away as each time I thought we had reached the end only to find another layer!


Ive used three of those boxes to create this project.  On the top Ive made a little house out of chipboard, and then made some mini presents, again out of chipboard.  When I saw that wee chipboard piece Gift Wrap Central I couldn't resist making it the sign on my wee house :)


My poinsettias Ive curled in on themselves and added some jewels from the yellow hues, die cutting a couple of different style leaves from my paper pad.


Lastly it needed some tags.  And of course Santa ;)


So how are your decorating plans coming along?  Its never too soon to start ;)
Incidentally, the other two boxes are yellow and they match Genevieve perfectly, just saying ;)

Tuesday, 22 September 2015

Stencil Storage with Provence - BoBunny DT

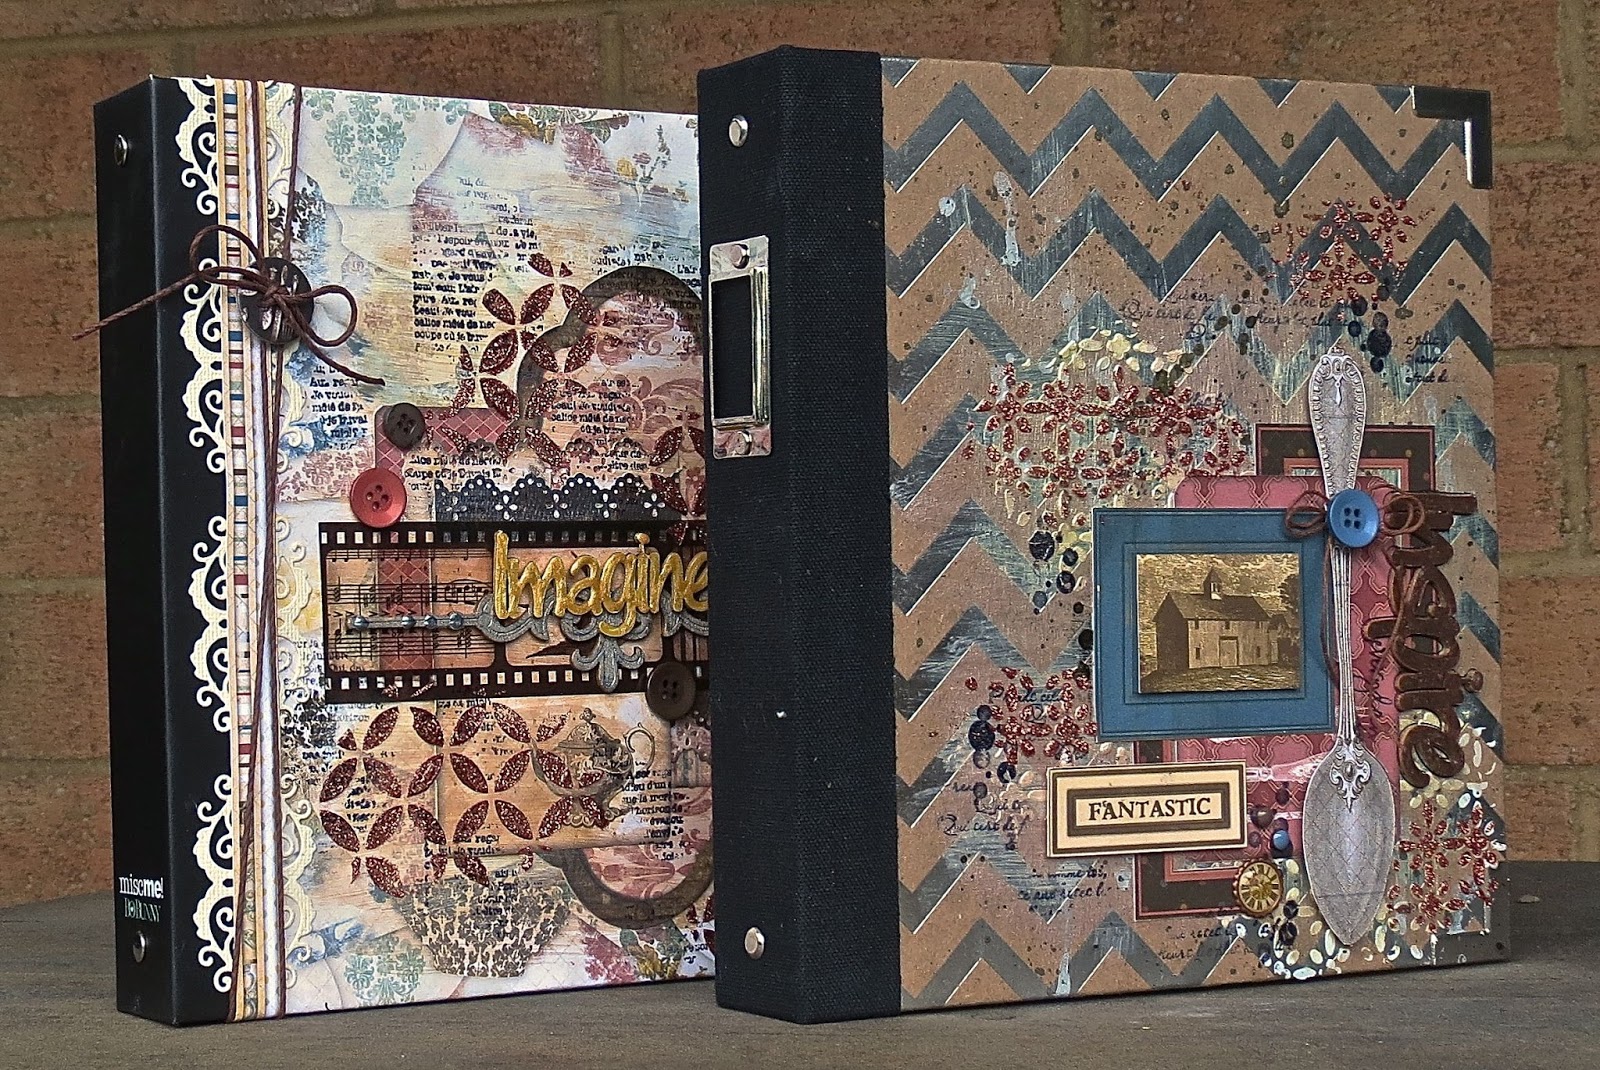
Remember that post I did recently about using Misc Me binders for my stamp storage?  Well I had another idea along the same lines, this time Im using the binder for storage for my new 6x9 Stickable Stencils, and my BB dies.


I wanted to keep most of the cool silver foil background, so I first gessoed the background and then roughly painted the background with Butterscotch and Coral Pearlescents, before using one of the new stencils -  Starling - with Copper Glitter Paste.


A bit of fussy cutting created layers, with some random stamping using To The Point stamp.


My chipboard piece I just coloured in with Chocolate Pearlesents, and then outlined with a black sharpie.


Heres a closeup of that fabulous wee stamp from the set.
Its a cold wet down here, perfect for a day creating by the fire :)  Roll on spring, where are you?!

Monday, 21 September 2015

Sleigh Ride - BoBunny DT

The mid year reveal of collections from BoBunny this year were AWESOME!  Sleigh Ride was one of my favourites :)  C'mon, if you know me well you will so know why lol. Blue and snowflakes :) :)  I had a couple of ideas for OTP - no surprises there lol, - but I decided to first do a layout.  We don't get a lot of snow where I live so I borrowed some pics from friend in Ireland from last winter.


Ive kept it really simple, using one sheet of paper for the base, glitter paste over a stencil, layering some Noteworthy pieces and creating a cluster of poinsettias and a smidgen of fussy cutting.  Now that I write that down it doesn't sound simple!


Two of the trees have been fussy cut from the same piece of paper that the poinsettias are die cut from.  Ive then layered on top of two trees, a third tree from the layered chipboard pack, creating depth to my tree cluster.


Over the background of the my base paper Ive used Gold Glitter Paste over one of the new Stickable Stencils, Snowflake.  I can't say enough how I love glitter paste!!!  Layer it on thick or thin, it still looks fab and dries super quick!


Another little closeup shows the glitter paste and the Spellbinders Poinsettia Ive made.

If you're heading towards Winter this collection will be awesome for you!  Then again if you just finished winter you will no doubt already have the perfect pics ;)

Thanks for popping by, see you next time!

Friday, 28 August 2015

A Crate of BoBunny Flowers

Hello again ;)

Two posts in one week lol. What can I say, its my birthday!!


One of the things I loved about the Juliet Collection was all the graphics of flowers.  The fussy cutter in me was in heaven :)  I also loved the planks of wood on the Juliet piece of paper, and it got me thinking.  About wooden crates! and with all the new collections that BB have just brought out my head has been dancing around with ideas to fill more crates, so don't be surprised if more appear ;)


Ive used brads as stamens for my flowers and mixed them in with BoBunny Blossoms and fussy cut flowers.  The butterflies are cut from the Primrose Collection.


Some flowers have been fussy cut from the papers.  Others I have made using a mixture of dies from Heartfelt Creations.  Im adoring that Fushia die!  All the leaves and vines have been cut from a mixture of Juliet papers and Double Dot papers.

I wonder which collection I'll be making a crate out of next ;)

Tuesday, 18 August 2015

Thinking Outside the Square - BoBunny DT

Its not secret I don't do Misc Me or any type of pocket scrapbooking on a daily basis like most people.  I tend to use them for trips and short holidays, or as a record of the classes Ive taught.  You can see that here.


This time Ive taken the smaller 8x9 binder, and paired it with the 8x9 Recipe Page Protectors to store my BoBunny stamps.  I can fit two to a page and they fit perfectly - you'd think they were made for them lol.

Ive decorated the front and back covers with papers and embellishments from the new Provence Collection.  I LOVE this collection!!!
First I have dry brushed gesso onto the base piece of paper, Porcelain and then brushed over that with Pearlescents - Gold and Coral.  Once all that was dry I used the new Stickable Stencil Whimsy with some yummy Blush Glitter Paste and then randomly stamped my favourite script stamp, It Is Written.
To the side of the binder Ive layered the Elegant Border die with stripes that are on the reverse of the Toile piece of paper.  Ive also created a cluster of elements using the pocket squares of the Toile Paper.


The chipboard word is from my stash.  The wooden flourish is part of BoBunny's Iron Works Wood Shapes.  Ive decorated both with Pearlescents - Gold and Graphite.  The filmstrip is from the Rose Cafe Collection and I think matches this collection so well.


So heres the inside - 7 pages of stamps!  And much easier to cart around!
Thanks for popping by, See you next time :)

Sunday, 26 July 2015

Juliet - BoBunny DT

Winter is nearly over thank heavens and we've had some gorgeous sunny days lately, hopefully there will be lots of those lovely days over the summer.  But at least the winter weather is great for staying inside and scrapping away to my hearts content! and doesn't make me feel guilty for not being outside in the garden :)

Today I wanted to share one of my favourite photos of our pooches, with one of my favourite paper collections.  Juliet!  I just love this paper range, its a fussy cutter and flower obsessed scrappers heaven ;) Its perfect for me!


When I do any layouts or cards, I tend to steer away from the stripes - besides using them for strips or that faux ribbon look I don't really utilise them.  So I set myself a challenge to use them and rummaged around in Pinterest looking for ideas and thats how this layout came about.  Well I did have this photo that my BFF took awhile ago as she was leaving our place, that Ive been dying to scrap for awhile as well.  Don't they look so cute with their heads popping out through the doorway?  :)  I also wanted to utilise my Silhouette more so I had ended up with a set criteria I wanted to include.  I think I achieved that.


I took Milan and Full House from the Juliet collection and cut them in half, then joined them together with washi tape. I created my background using the Brocade stickable stencil, random stamping and spraying with Bronze and Gold.   The flourish and heart are cut using the Silhouette from Chocolate Double Dot.  I then used my favourite stamp - Stitches - around the edges, mixing it up with straight stitching and zigzag.


Im really pleased with it, hope you like :)  If you want to see it in the flesh its up on display in The Paper Teapot :)


Tuesday, 30 June 2015

A layout for a change ;) Boardwalk - BoBunny DT

Hello again :)

One of the new collections BoBunny released recently was Boardwalk and its proved popular amongst those of us on the DT.  You can see what Gabi's made with it here, her cards are gorgeous!

This time I decided to do a layout.  Its been noted, its been a while since Ive done one ;)  and when I thought about it, they were right!  lol.
I 'borrowed' my friend's children again, they're so cute, not that Im biased ;)


To create the back ground theres a whole mixture of distressing and tearing papers, layering of Pocket Squares, stamping and spraying and splattering glimmer sprays.  I don't do PL or Misc Me type scrapping but they are super easy to use on backgrounds!
Three sheets of paper create the base page, tearing across the white page and then layered on top of the beach umbrellas.  The aqua seahorses were added to the bottom so that it over lapped the bottom of the white piece.


Ive distressed muslin and then sprayed it with different glimmer sprays before adhering it to my page.  To make the 'happy' title stand out, because it was fading away into the page before I did this, - I went around it in black pen.


Layering of some Noteworthy elements and a bit of paint splattering and random stamping.


Heres another closeup for you using another of items.  Layered chipboard, Noteworthy items, brads, distressed muslin and stamping.

Thanks for popping by :)